 Fortress Windows
Fortress Windows
Fortress Windows
How To Upgrade Old Homes With Modern Windows in 2026 requires more than replacing drafty glass. It demands careful observation, accurate measurements, and respect for the building’s original character. A century-old house may have uneven frames, soft timber, or hidden moisture around the sill. Ignoring these details can turn an efficient window project into an expensive repair.
Architect Carl Elefante offers a useful principle: “The greenest building is the one already built.” His statement supports a practical approach: improve the existing home before removing everything. A professional assessment should check window orientation, air leakage, condensation, and local climate needs. Low-emissivity glass, insulated frames, and suitable U-factor ratings can reduce heat loss. Solar heat-gain control also matters, especially on south- and west-facing walls. However, modern performance should not erase historic proportions, trim, or ventilation habits.
No window is perfect. Sometimes, repairing an original sash and adding an interior storm window performs better than installing a poorly fitted replacement. That possibility is easy to miss. Homeowners should request itemized quotes, product certifications, installation details, and warranty terms. They should also confirm whether the proposed design meets local preservation requirements. A skilled installer will explain trade-offs rather than promise instant savings. The result should feel quiet near the glass, warmer beside the frame, and visually consistent from the street. Energy savings may take time, and flawed assumptions deserve review. Good upgrades are measured, reversible where possible, and shaped by the home’s actual condition.
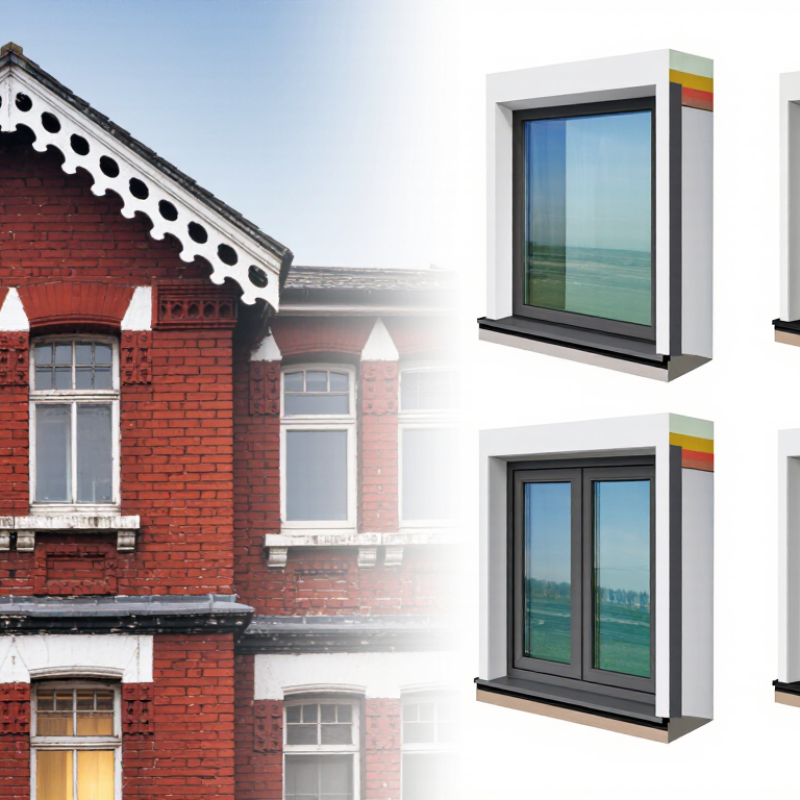
Before choosing modern windows, inspect how your old home performs. Walk through each room on a windy day. Feel for drafts around the sash, frame, and trim. Look for peeling paint, soft wood, cracked glass, condensation, and dark marks near corners. These details often reveal water entry or poor ventilation.
Open and close every window carefully. A window that sticks may have shifted, swollen, or suffered hidden frame damage. Check whether locks work and whether the sash stays open without support. Measure the visible opening, but do not trust one measurement. Older homes are rarely perfectly square. A qualified window professional should verify dimensions and inspect the surrounding wall before ordering replacements.
Energy loss is only one concern. Consider street noise, sunlight, indoor humidity, emergency escape needs, and the home’s architectural character. Historic trim may deserve repair instead of removal. In some cases, upgrading weather seals or adding a suitable interior panel can improve comfort while preserving original glass. Full replacement may be justified when frames are rotten, windows cannot be repaired, or moisture keeps entering the wall.
Be cautious with quick estimates. A low price may exclude trim repairs, disposal, flashing, or interior finishing. I have seen homeowners focus on glass performance and overlook damaged sill framing. That mistake can become expensive. Ask for written recommendations, product performance data, installation details, and evidence of relevant training. Inspect the wall after removal, because old damage is sometimes hidden.
| Assessment Dimension | What to Check in an Older Home | Common Existing Condition | Modernization Benchmark or Target | Recommended Upgrade Direction | Priority |
|---|---|---|---|---|---|
| Window Age | Identify the approximate installation date and whether the original frames are still in place. | Single-pane or early double-pane units, worn seals, and outdated hardware are common in windows installed several decades ago. | Prioritize units with failed glazing seals, deteriorated frames, or persistent drafts rather than replacing windows based on age alone. | Repair serviceable windows; consider full replacement when the frame, sash, and glazing all show significant deterioration. | Medium |
| Glazing Type | Check whether the glass is single-pane, clear double-pane, low-emissivity double-pane, or triple-pane. | Single-pane glass has substantially higher heat transfer than insulated glazing and often produces cold interior surfaces in winter. | Low-emissivity insulated glazing can reduce heat transfer; triple glazing may be appropriate in very cold climates or for high-performance projects. | Replace single-pane units first, especially in bedrooms, living areas, and rooms with noticeable temperature differences. | High |
| U-Factor | Review the whole-window U-factor on the performance label or product documentation. | Older windows commonly have higher U-factors, indicating greater heat flow through the window assembly. | Choose a lower whole-window U-factor suited to the local climate; colder regions generally benefit from stronger insulation performance. | Compare complete-window ratings rather than glass-only values, because frames and spacers affect total performance. | High |
| Solar Heat Gain | Consider window orientation, shading, climate, and whether rooms overheat during sunny periods. | Unshaded west- and south-facing windows may cause summer overheating, while low-sun homes may benefit from useful winter solar gain. | Use a climate-appropriate solar heat gain coefficient: lower values generally reduce unwanted summer heat, while higher values can admit more winter sun. | Combine suitable glazing with exterior shading, interior shades, or overhangs instead of relying on glass selection alone. | Medium |
| Air Leakage | Inspect weatherstripping, locks, meeting rails, caulk joints, and gaps around the frame. | Rattling sashes, moving curtains, whistling sounds, and visible daylight indicate possible air leakage. | Select tested windows with low air-leakage ratings and seal the rough opening correctly during installation. | Start with weatherstripping and perimeter sealing when the window itself is sound; replace units with warped or severely leaking sashes. | High |
| Condensation | Record where and when moisture appears: on the room side, between panes, or on the exterior surface. | Moisture between panes usually indicates an insulating-glass seal failure; interior condensation may also reflect high indoor humidity or poor ventilation. | Use durable sealed insulated glazing and maintain indoor humidity appropriate to outdoor conditions and building ventilation. | Replace failed insulated glass where the frame is sound; address humidity, exhaust ventilation, and cold bridges before assuming replacement is the only solution. | High |
| Frame Condition | Inspect wood for rot, metal for corrosion, and all frame materials for warping, cracking, or water damage. | Water-stained trim, soft wood, flaking coatings, and distorted frames can reduce service life and compromise air sealing. | Frames should be structurally sound, properly flashed, and compatible with the wall assembly and local moisture conditions. | Repair minor surface damage; replace or rebuild frames with structural decay, repeated leakage, or extensive distortion. | High |
| Water Management | Check sill slopes, head flashing, side flashing, exterior sealant, and signs of staining below the window. | Old installations may lack continuous flashing or may have cracked sealant that allows water into the wall cavity. | Use a properly integrated sill pan, flashing sequence, drainage path, and compatible exterior sealants. | Correct water-entry details before installing replacement windows; cosmetic caulking alone may conceal ongoing damage. | High |
| Operation and Safety | Test opening, closing, locking, ventilation positions, emergency escape operation, and child-safety needs. | Painted-shut sashes, broken balances, weak locks, and difficult-to-operate units are common maintenance and safety concerns. | Windows should operate smoothly, lock securely, and meet applicable egress and safety requirements for their location. | Repair hardware where practical; prioritize bedrooms and other rooms where emergency escape or ventilation is important. | High |
| Noise Control | Identify traffic, aircraft, construction, or neighborhood noise and determine whether it enters mainly through glass, gaps, or walls. | Thin single glazing and leaky frames usually provide limited sound reduction. | Use laminated or acoustically improved glazing, airtight frames, and carefully sealed installation when sound control is a major goal. | Seal air paths first; specify upgraded glazing only after confirming that the window assembly is the dominant noise path. | Medium |
| Historic Character | Determine whether the home or façade is historically significant and whether exterior appearance must be preserved. | Original proportions, muntin patterns, trim profiles, and opening dimensions may be important design features. | Modern performance improvements should retain compatible sightlines, profiles, and exterior details where preservation rules apply. | Consider interior storm panels, sash restoration, discreet weatherization, or custom replacements that match the existing design. | Medium |
| Installation Method | Determine whether the existing frame can remain and whether the surrounding wall can be opened without damaging cladding or interior finishes. | Insert replacements may preserve trim but can reduce opening size; full-frame replacements provide better access for inspection and flashing. | Select the installation method based on water management, insulation continuity, rough-opening condition, and finished appearance. | Use insert installation only when the existing frame is sound; use full-frame installation when deterioration or leakage is present. | High |
| Whole-Home Prioritization | Map window problems by room, façade, orientation, and severity rather than replacing every unit automatically. | North-facing, wind-exposed, shaded, and heavily used rooms may have different performance needs. | Prioritize safety, water intrusion, severe air leakage, failed seals, and high-comfort-impact windows first. | Use a phased plan: urgent repairs first, high-loss windows next, and lower-impact aesthetic upgrades later. | Medium |
Walk through each room on a windy day. Feel for drafts around the sash, frame, and trim. Look for peeling paint, cracked glass, condensation, soft wood, or dark corner marks.
Sticking may indicate swelling, shifting, or hidden frame damage. Check the locks and sash support. A window that will not stay open needs closer inspection.
No. Older openings are rarely perfectly square. Measure width and height at several points, then record the smallest measurements. A qualified professional should verify them.
Not necessarily. Repairing historic trim, improving weather seals, or adding an interior panel may improve comfort. Full replacement makes more sense when frames rot or moisture keeps entering.
It may exclude trim repairs, disposal, flashing, or interior finishing. Ask for written recommendations, performance data, installation details, and training evidence. Cheap estimates can age badly.
Expect dust, hidden fasteners, and damaged framing. Wear gloves and eye protection. Score painted joints carefully. Do not force a stuck frame.
Scrape loose sealant and wood fibers. Vacuum the sill and corners. Check for moisture, mold, insects, softened wood, square, level, and plumb conditions.
Stop and seek professional assessment before installation. Repair weak areas with suitable materials and let them dry fully. Keep sill drainage paths open. This detail is easy to miss.
It confirms the replacement unit’s position and operation. Check the fit again, even if the opening looks perfect. A small gap can affect movement and cause leaks.
How To Upgrade Old Homes With Modern Windows begins with a careful assessment of the existing windows, including their age, condition, drafts, moisture issues, and compatibility with the home’s architectural character. Homeowners should then compare modern window styles, frame materials, glazing options, ventilation features, and energy-saving designs to find solutions that improve comfort, appearance, and efficiency. Clear planning is essential, including accurate measurements, local permit checks, a realistic budget, and a suitable installation schedule.
During installation, the old windows should be removed carefully so the surrounding structure is not damaged. Each opening must be inspected, cleaned, leveled, and repaired before the new units are placed. Proper shimming, fastening, insulation, and weatherproof sealing help prevent air and water infiltration. After installation, the windows should be tested for smooth operation, secure locking, and reliable sealing. Regular cleaning, hardware checks, and timely maintenance will help preserve performance and extend their service life.
